Pneumatic 22 Gauge 3/8 in Crown Upholstery Stapler 7116/436

Pneumatic 22 Gauge 3/8 in Crown Upholstery Stapler 7116/436Pneumatic 22 Gauge 3/8 in Crown Upholstery Stapler 7116/436,This fine wire staple gun is ideal for upholstery, automotive vinyl and other fabric projects.The stapler uses 22 Gauge, 3/8 in. crown staples and drives 1/4 in. through 5/8 in. length. ● Perfect stapler for auto and marine vinyl trim, upholstery, small furniture repairs, picture frames and many more useful applications. ● Tool-free depth adjusts. ● 360° adjustable exhaust. ● non-marring tip and comfortable grip allow for a user-friendly experience. ● Long nose design for tight space. |
| Model: | Pneumatic 22 Gauge 3/8 in Crown Upholstery Stapler 7116/436 |
| Air Tool Type: | Air Stapler |
| Tool Diamensions: | 190mm x 45mm x 220mm |
| Net Tool Weight: | 1.10kgs (2.42 lbs) |
| Operate Pressure: | 60-100psi (4-7bar) |
| Load Capacity: | 190 staples |
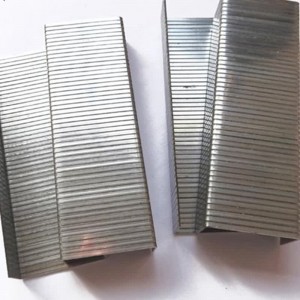
| Staples Type: | 22 Guage 71 Series Fine Wire Staples |
| Staples Crown: | 3/8″(9.0mm) |
| Staples Shank Diameter: | 0.030″(0.75mm) x 0.024″(0.60mm) |
| Staples Length: | 1/6″(4mm)~5/8″(16mm) |

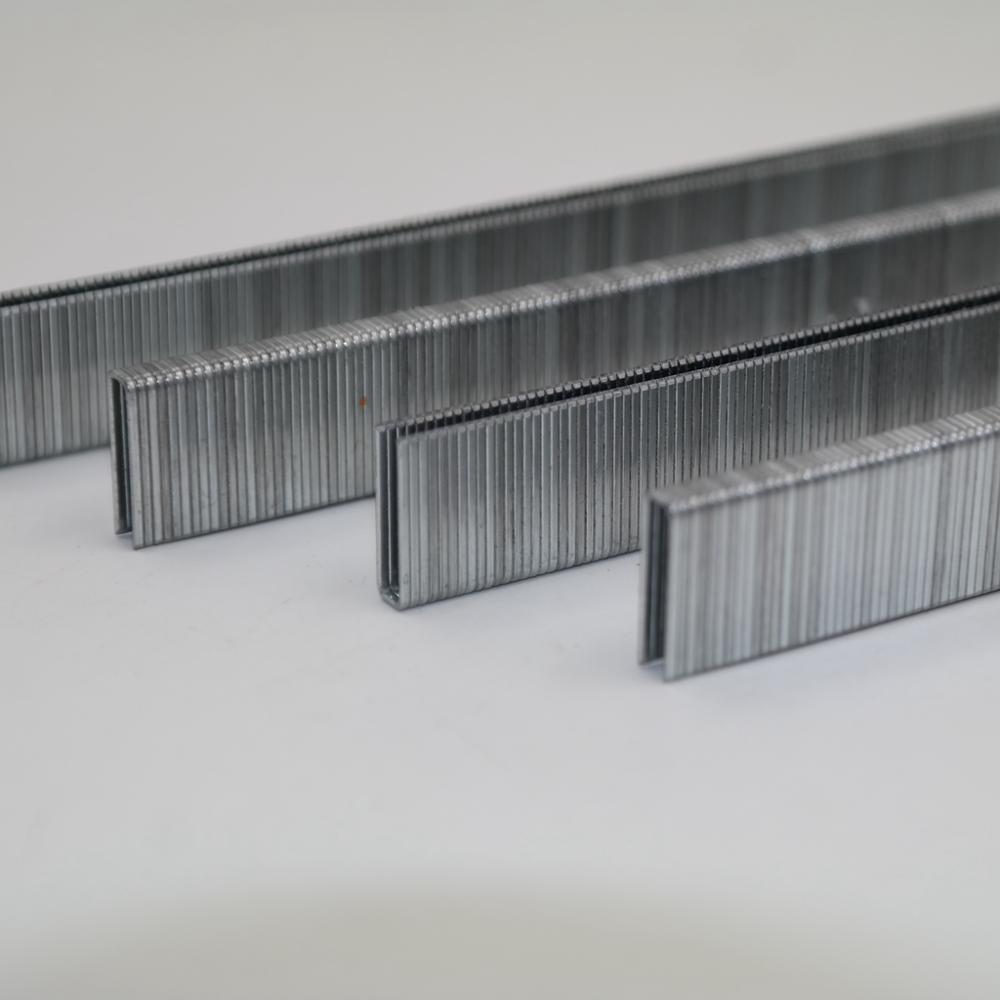
| 22 Guage 71 Series Fine Wire Staples |
| Staples Crown:3/8″(9.0mm) |
| Staples Shank Diameter:0.030″(0.75mm) x 0.024″(0.60mm) |
| Staples Length:1/6″(4mm)~5/8″(16mm) |
 Lightweight body for easy operation.
Low noisy have good feedback from suctoerm.
Powerful strength and excellent durability.
Long nose design for tight space.
Same as 71/16-436
Furniture manke and repair.
Cloth and wood connection.
Picture frams.
Decoration.

| No. | Symptom | Problems | Solutions | |
| 1.1 | Air Leak | Air leak in the cylinder cap when tools don’t work | 1.Loose head valve piston seal or o-rings . | Check and replace the head valve piston set |
| 2.Worn or damaged o-ring or cylinder cap gasket under cylinder cap | Check and replace o-ring or cylinder cap gasket under the cylinder cap | |||
| 1.2 | Air leak in Trigger area when tools don’t work | 1.Damaged o-ring in trigger valve | Check and replace o-ring | |
| 2.Damaged o-ring in trigger valve stem | Check and replace o-ring | |||
| 3.Dirt in the trigger valve | Check and clean the trigger valve | |||
| 1.3 | Air leak in cylinder cap when tools are working | 1.Damaged head valve piston o-rings | Check and replace o-rings | |
| 2.Damaged seal under cylinder cap | Check and replace seal | |||
| 1.4 | Air leak in nose when tools are working | 1.Worn or damaged bumper | Check and replace bumper | |
| 2.Loose driver(piston unit) thread | Check and replace driver(piston unit) | |||
| 1.5 | Air leak in Trigger area when tools are working | 1.Worn or damaged trigger valve head | Check and replace trigger valve head | |
| 2.Damaged head valve piston o-rings | Check and replace head valve piston o-rings | |||
| 2 | Failed to get driver(piston unit) back to the correct position completely. | 1.The driver(piston unit) is not straight or the driver guide(nose) is wrong assembled. | Straighten the driver(piston unit) or verify driver guide(nose) and magazine | |
| 2.Worn or damaged nozzle | Check and replace nozzle | |||
| 3.The space between piston o-ring and cylinder is too tight. | Check if the cylinder is adequate lubrication or replace the o-ring on the piston. | |||
| 3 | Work weakly and sluggishly | 1. Worn or damaged piston o-ring | Check and replace piston o-ring | |
| 2.Inadequate lubrication for head valve piston o-rings or too tight head valve piston o-rings | Place 2 or 6 drops of oil on o-rings or replace head valve piston o-rings | |||
| 3.Dirt in the nozzle | Check and clean the nozzle | |||
| 4 | Tool jams frequently | 1.Damaged or Worn driver (piston unit) | Check and replace driver (piston unit) | |
| 2.Damaged or Worn driver guide (nose) | Check and replace driver guide (nose) | |||
| 3.Driver guide cover is bent,so the space between driver guide cover and driver guide is too big | Check and replace driver guide cover | |||
| 5 | Nail can not be shot | 1. Driver (piston unit) can’t return to the correct position. | Refer to no. 1 Symptom | |
| 2.Driver guide(nose) can not match magazine well | Check and correct the position between driver guide(nose) and magazine | |||
| 3.Worn or damaged nail pusher compression spring | Check and replace nail pusher compression spring | |||